Tag: Tech
-

Neopixel Frustrations to Custom RGBW LED Modules
The design for the light module comprises four main controlling components, BGRW (as shown in the animation below. Each part is individually controlled via 4 PWM signals from the flight controller addressing each light color:
-
React State – MFED 03
A new concept I’m starting to learn in my Coursera course on React Basics (view post series here) is React “States.” States in React is an interesting way of storing the “state” or current information about a variable or function. ⓘ As a new topic, I’m still learning how React works. For an actual professional,…
-
Circumventing Safety Features
I recently encountered an interesting problem when configuring all three drones simultaneously with the Skybrush drone management software. I would power up all three drones and connect them to the network I configured for them. All three would appear on my laptop. After double-checking that they were actively connected, I manually rebooted each one and…
-
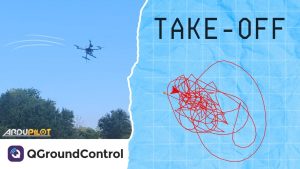
Drone Light Show (Part 3) – Build Goes Sideways
Unfortunately for me, the takeoff did not exactly go “up” but rather sideways. When pushing the throttle stick, the drone would start to lean backward and or start rotating when meant to fly straight up…