Tag: Short Read
-

Week One – MFED 01
At the beginning of July, I started a course on front-end web development taught by the Meta (Facebook) team on Coursera. It goes through 9 mini-courses in which it teaches you, from the introduction to how things on the Internet work to preparing for a coding interview over six months. I so far have completed…
-

Drone Light Show (Part 1) – Research
I’ve been recently looking into building custom drones for a light show. A drone light show is a fleet of drones with lights that fly synchronously to display an image or animation in the sky. Each drone has a GPS tracking device to ensure proper distance and movement. One central base station on the ground…
-
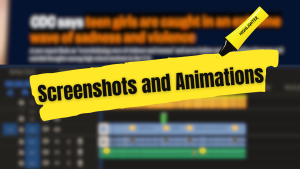
Enhancing Impact with Screenshots and Animations
inserting screenshots to get your point across effectively is hard. And after I’ve played around with a few different methods in attempts to improve that, I think I’ve significantly improved it…
-
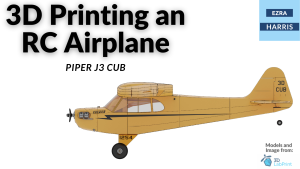
3D Printing an RC Plane
I spent about three weeks working on 3D printing an RC plane. I had initially searched for a somewhat easy RC plane to print and assemble as I’ve never had any experience with RC vehicles in general. I eventually found a good model that was both free and looked simple enough for me to be…