Recently I bought another 3d printer from a friend of my brother (Caleb). The original printer is a Creality CR-10 S5. This printer is the largest in the CR -10 series lineup, with a print size of 500x500x500 mm, which is massive compared to the average 3d printer.


I bought the new printer for about $340. The printer, when sold new, is about $700, but since the original owner had fully customized it with upgrades and it had to be tweaked with a couple of issues. The original owner had upgraded almost every part of the printer. For example, he upgraded the extruder to Direct Drive Extruder (DDX), which means it has the motor for driving the filament into the nozzle that is closer and attached to the same frame as the extruder is mounted. Another upgrade he made was to install a new chassis for the bed Y-axis (which is in the image below), which the upgrade makes the stability more reliable.

I had an issue with his Y-axis end-stop switch because it was too close to the stopping point where it triggered and was telling the printer the incorrect way. For example, when it was moving the Y-Axis motor, it hit the switch, which meant it thought that the bed was more forward than what it was supposed to be, so the motors would start grinding, tiring to move the bed further forward even though it was hitting the end. I was able to fix this by finding a simple switch holder for the Z-axis (all of the switches are the same type), and I edited it in fusion 360 to fit the same chassis that the old one was mounted onto. I then printed it on my Ender-3. I also attached a piece of aluminum which I cut to connect to the bottom chassis of the bed. Once I got the parts attached, I had to adjust the limit switch location to get it just right.
When moving the 3D printer, I have to disconnect about ten cables to the motors, switches, extruder, etc. When I plugged back the extruder motor into the mainboard, an issue I had was that it just didn’t respond at all. I was able to fix this by unplugging and replugging the cord to the mainboard, but I’m still not quite sure why I had this issue in the first place since the pins were touching.
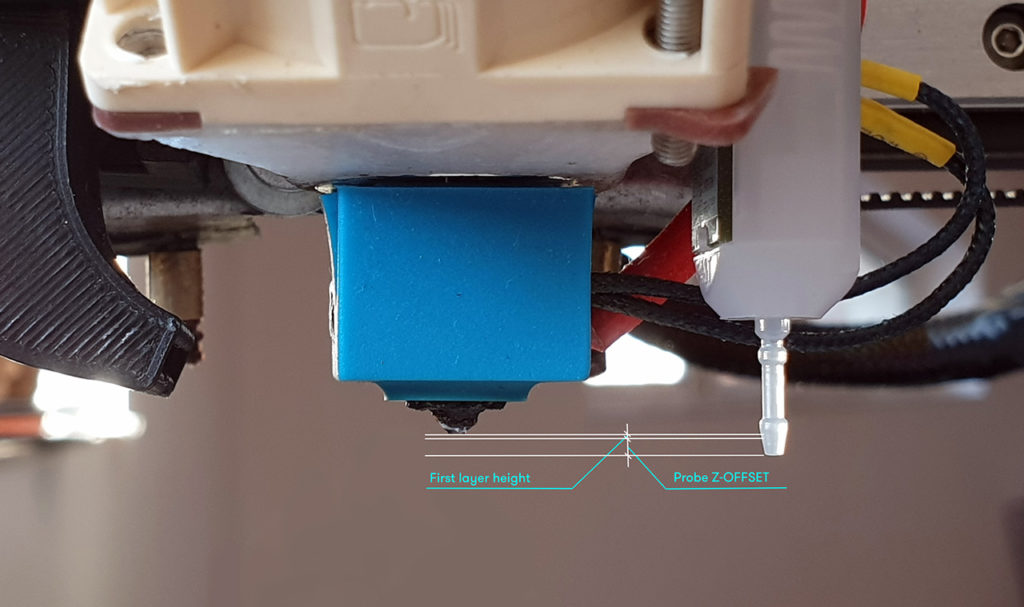
I also purchased a BL touch since the board seemed slightly warped when heating the bed from the middle. The BL touch is easily the best and cheapest upgrade for many printers that don’t come with auto-leveling. The way it works is it has a small plastic piece that “probes” the board to see how far away it is from the bed and does this in a 3×3 pattern on the printer, so you don’t have to manually turn the knobs to level the bed which can be a long and painful process.

The last upgrade that I am currently dealing with is the bed build surface. The original surface that the original owner put on was not of the best adhesion and had several large bubbles, which can be an issue when printing. So after some research, I found that the best overall material is PEI which can be pretty stick when the adhesion is in mind. But the only problem is since my build plate area is so large (500×500 mm or 19×19 in), it’s hard to find the right size for it when the average printer is in the 100-300mm range. I eventually found one for a reasonable price on Amazon for about $84
Although I first needed to get a glass bed for a flat surface after trying to find one for my printer was sad to discover that they are either nowhere to be discovered or at least another $60. So I saw a sheet of glass that was 24×26 inches on home depot for about $13, which combined with a glasscutter so I can fit it to the correct build plate size will come out to be around $20. which is considerably cheaper than purchasing a dedicated glass build plate for my printer.
Overall I still need to spend hopefully only one more thing to get this fully working and get clean prints off for the future. I post a lot of updates on my Instagram page. Follow if you want to see more videos of the process.
Leave a Reply