Category: Drone

  • Neopixel Frustrations to Custom RGBW LED Modules

    Neopixel Frustrations to Custom RGBW LED Modules

    After having issues with the Neopixel LED modules on the two newer drones (a blog post about that headache is coming soon…), I decided to try a different design by Techventures Sean for an LED module based on the use case of Skybrush drones.

    Heads up, this post is part of a more extensive series about building drones for a small drone show. This post is part six of the series, and previously, I covered 3D designing mounts for the LED modules from Adafruit.

    I mentioned two separate LED module designs in the first paragraph. But what are these two options?

    The option we have currently implemented is the 4W LEDs from Adafruit. These are cheap and offer a plug-and-play way to light up the sky. They also work under the NeoPixel branding, so documentation is extensive. I covered that setup in this post:

    The second option is what I’ll be covering in this post. Sean, the creator of this design, recommended it to me on the Skybrush Discord when I expressed frustration with some problems with the Neopixel LEDs.

    The design for the light module comprises four main controlling components, BGRW (as shown in the animation below. Each part is individually controlled via 4 PWM signals from the flight controller addressing each light color:

    After reviewing most diagrams and parts and looking at what tools I need for assembly, I ordered all the necessary parts from JLCPCB (which manufactures PCBs), LCSC Parts (which manufactures the elements, like resistors and capacitors), and the LED chips themselves from Amazon. Shipping took about a week to arrive.

    img: Sean (TechVentures)

    light module from Sean Techventures. PCB DESIGN

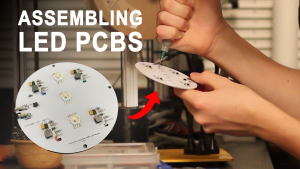
    I began attempting to solder the first parts onto the PCB when it became more apparent how unprepared I was. One obstacle was the solder itself. I installed my TS101 soldering iron with a small tip, but the solder wasn’t flowing well, and flux made a mess of it.

    Close up of solder paste under microscope

    I ordered a similar but thinner version of the solder I’d been using called Solder Paste. Solder paste comprises primarily micro solder beads, which, mixed with a flux-like liquid, lowers the melting temperature to about 180c instead of the 250c I had been accustomed to. 1

    img: Solder paste on PCB, with a closeup taken under the microscope.

    With the soldering down and the assistance of a microscope, I could nail down the assembly: placing the components and eventually soldering them into place. Although the first attempt did come with its problems, more minor mistakes mostly – not being patient and forgiving when I misplaced a component. Remember how much solder paste needs to be pre-applied.

    Also, realizing I made a small ordering mistake in the number of specific components I needed to place on the PCB, I am currently waiting for that order to complete the assembly.

    1. Unfortunately, the PCB is designed with heat dissipation in mind. It is made almost entirely of aluminum, making it more challenging to get the solder to the required melting temperature. ↩︎

  • Circumventing Safety Features

    I recently encountered an interesting problem when configuring all three drones simultaneously with the Skybrush drone management software.

    I would power up all three drones and connect them to the network I configured for them. All three would appear on my laptop. After double-checking that they were actively connected, I manually rebooted each one and confirmed the connection using the Skybrush software.

    With propellers removed, pre-arm checks approved. I would go and arm each drone.

    “Arming” is the last step before takeoff for a drone. “Pre-Arm” ensures all safety checks (foreshadowing) are completed but does not start up motors. Arming, on the other hand, starts the motors at a low rpm and listens for control inputs (i.e., throttle up) for takeoff. It disarms if no input is provided within 10 seconds of the motors spinning.

    But here’s where the problem occurred. Only one drone would go into arming mode, while the other two reported an “unknown” error and blinked red.

    After some research and trial and error, I discovered that the drone reported an “RC Not Found” error to the ground station.

    Now, that’s strange; it should be configured to ignore whether or not it had an RC connection for Pre-Flight. I went into QGroundControl and manually configured it to ignore pre-flight checks for the RC. After a quick reboot, I tried again.

    Still, no luck, except the behavior changed slightly. After the blinking red error, I tried arming the drones again… and they all spun up! But Skybrush still showed them as reporting an error. This is not ideal for my case, but as the classic saying goes, a different error is still in progress.

    After more research, I found a forum post with someone asking a similar question and a super helpful user linking to a page about configuring ArduPilot with autonomous flight software like SkyBrush.

    It ended up being two parameters that affected my problem.

    • FS_THR_ENABLE – Allow arming without checking for RC
    • ARMING_CHECK – Disable RC failsafe for pre-arm checks

    Setting those two and a quick reboot resulted in all three drones being able to go into pre-arm, then arming mode, and ready for takeoff. The corrected values are:

    FS_THR_ENABLE0
    ARMING_CHECK1048510

    The longer string for ARMING_CHECK signifies which failsafe options to disable; Arducopter gives you 19 total options for failsafe, from Compass to Battery Levels. A complete list is provided here.

    And finally, here’s a quick reference list I had ChatGPT create based on the parameter’s instructions:

    Bit Check Value Description
    0 All 1 Enables all checks
    1 Barometer 2 Ensures the barometer is functioning correctly
    2 Compass 4 Verifies compass calibration
    3 GPS lock 8 Requires a valid GPS lock before arming
    4 INS 16 Checks Inertial Navigation System (IMU) health
    5 Parameters 32 Confirms parameters are set correctly
    6 RC Channels 64 Ensures RC signal is valid
    7 Board voltage 128 Monitors voltage levels of the flight controller
    8 Battery Level 256 Verifies battery level is sufficient
    10 Logging Available 1024 Checks if logging is available
    11 Hardware safety switch 2048 Requires safety switch to be engaged
    12 GPS Configuration 4096 Verifies GPS is configured correctly
    13 System 8192 Checks system-level health
    14 Mission 16384 Ensures a valid mission is loaded
    15 Rangefinder 32768 Checks rangefinder sensors
    16 Camera 65536 Verifies camera is functioning correctly
    17 AuxAuth 131072 Checks auxiliary authorization systems
    18 VisualOdometry 262144 Monitors visual odometry sensor health
    19 FFT 524288 Verifies Fast Fourier Transform data availability

  • NeoPixel With ArduCopter

    NeoPixel With ArduCopter

    The first test with LEDs remotely powered and controlled onboard by a drone

    I got the NeoPixel LEDs working with Arducopter and natively updating with the Drone’s current status:

    • Green = Armed & Ready
    • Blinking Yellow = PreArm Check
    • Red = Error / Failsafe

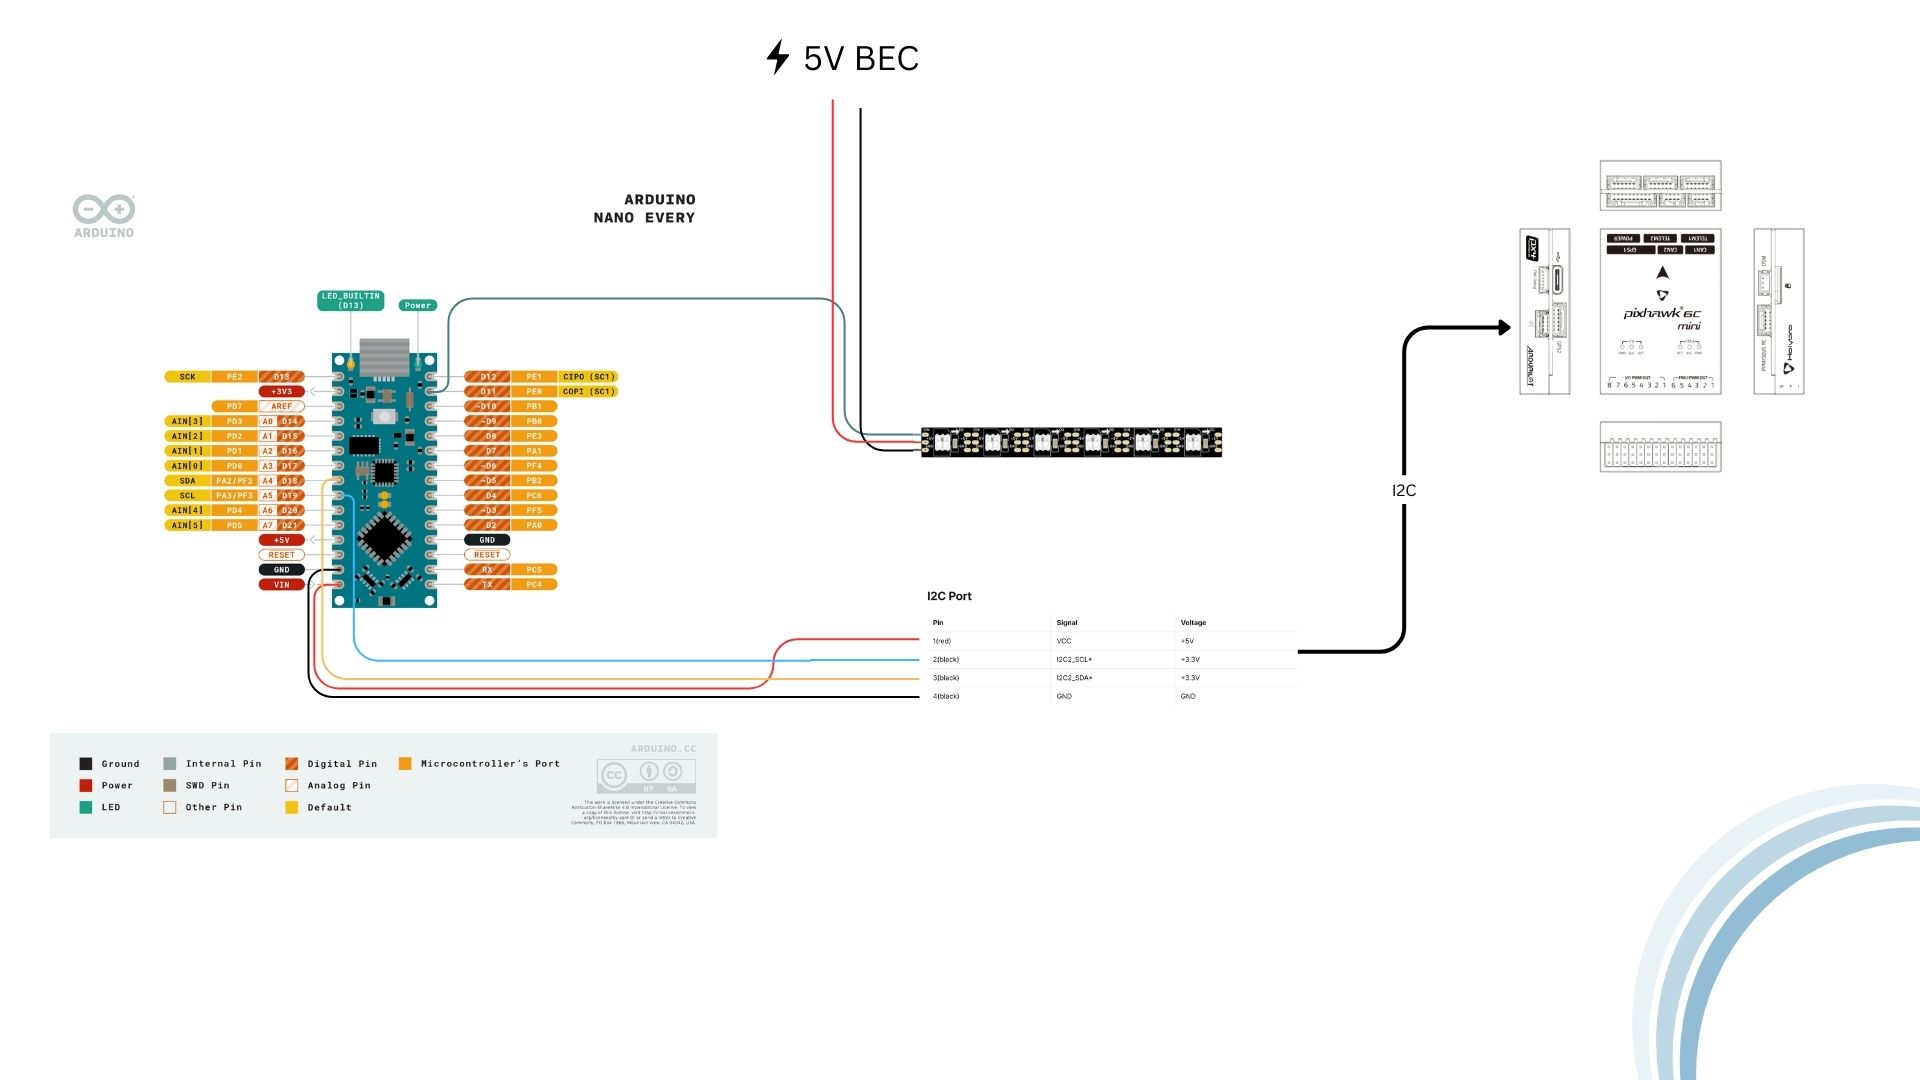
    The hardware setup for powering the lights was as easy as soldering my UBec to the output voltage pads to take power directly from the battery input.

    Power Diagram for S500 Power Delivery Board

    The wiring for controlling the LEDs was also fairly straightforward. I utilized one of the six open FMU PWM OUT ports’ signal pins. In PX4’s documentation, they list the FMU PWM OUT as AUX ports, which will be suitable for this case.

    I also used an Arduino Dupont wire from (S) Signal for initial testing. The other end of the wire was connected to the Neopixel’s middle signal wire.

    It was a bit of trial and error for software, but overall, it was not a big hurdle; I changed the following parameters to let ArduCopter know there is a Neopixel connected to one of the FMU PWM ports. (Which, in this case, is classified as an AUX port, according to ArduCopter):

    SHOW_LED0_CHAN13
    SHOW_LED0_COUNT1
    SHOW_LED0_TYPE10
    ArduCopter parameters to reflect Neopixel

    SHOW_LED0_CHAN sets the channel for which the Neopixel is connected. In this case, channel five on the FMU OUT is equivalent to AUX 13.

    As the parameter implies, SHOW_LED0_COUNT is the number of LEDs chained together since most people plan to chain more than one LED.

    SHOW_LED0_TYPE is the type of LED that is connected. For my specific case, I have a Neopixel RGBW assigned to 10. There is a non-RGBW Neopixel variant which has the assigned value of 3.

    A quick reboot will apply the settings, and from there, I was able to change the lights and test them using Skybrush Live.

    This post is part of a series of posts on drone light shows. I am actively updating docs.ezraharris.com to provide more step-by-step instructions while configuring Drones for a light show.

  • Drone Light Show (Part 3) – Build Goes Sideways

    Drone Light Show (Part 3) – Build Goes Sideways

    For the past few weeks, I’ve been working on getting a drone ready for takeoff and, ultimately, for formation in a light show. Since the last blog post on unboxing, I soldered the battery module onto the drone’s PDB (Power Distribution Board) with some success.

    I access the flight controller using software called QGroundControl, which has all the necessary tools for setting up and pre-planning flight routes with the Drone’s GPS. I utilized a mixed connection of USB and Wi-Fi, the Wi-Fi setup was relatively easy. I only had to change one of the drone’s parameters to instruct it how to handle the Wi-Fi connection to Ground Control properly.

    After initial setup, I was able to calibrate all of the sensors related to positioning and orientation. (Useful documentation for specific details) Next was to attach props and arm motors for takeoff. Once prepped and the battery connected, we started a slow takeoff to see the responsiveness (or, in this case, lack of responsiveness)

    Unfortunately for me, the takeoff did not exactly go “up” but rather sideways. When pushing the throttle stick, the drone would start to lean backward and or start rotating when meant to fly straight up. After a lot of trial and error, I ended up installing the latest firmware for the board we’re using. But instead of the ArduPilot firmware platform I tried the Pixhawk firmware. This shouldn’t make a ton of difference, but it had a lot more options for setup and specific configurations related to the frame we’re using instead of the generic frame I selected before.

    With flashing new firmware, it requires me to setup all of the compass and calibrations done before. One of the hurdles of calibrations was an error being thrown when we had the drone in the forward position. It would throw a generic “Test Failed”  That was fixed with a simple parameter edit (parameters, in this case, are the manual settings for each part of the drone) that would change the primary sensor for all movement to the HolyBro RTK, instead of the flight controller. Which has a basic compass and accelerometer sensors.

    Another small stumbling block was referencing a guide I had used before, which SkyBrush provides in their docs. Specifically for basic parameter setup, you need to make sure the Drone is using the RTK onboard for primary 3D sensing (basic tilt, pan, etc.) When referencing that guide, it had specific settings to change. I later figured out that PixHawk and Ardupilot each have their own parameters, and they do not carry across names. Skybrush provides firmware that is based on ArduPilot. Some are similar, but ArduPilot had a lot more advanced options; it was a stumbling block but not a huge deal as I was able to find the substitutes for PixHawk.

    After reviewing a couple of examples and online forums, I realized that my motor setup was all wrong. I had both the motors spinning in the wrong directions and the motor frame setup.

    For example, this is what I believe I initially incorrectly set it up as and how it’s supposed to be laid out:

    The incorrect layout had three motors that were going CCW, which I found out when rearranging the motors as the wires were flipped. (This inverts the spin direction of the motor.) Thus, there were essentially three CCW spinning props. This caused the drone to start spinning or try to flip on takeoff. Ardupilot tried to compensate for orientation, and it ended up being a mess.

    After realizing this issue and fixing it, a quick takeoff showed that it was, in fact, the issue.

    First successful takeoff

    The day after, I reflashed Skybrush firmware and configured all of the recommended settings, and it took off as expected, showing that the motor orientation was, in fact, the main problem. The next step is to autotune and figure out what behavior changes are made in different flight modes.

    First field test

    This post includes the logos of Ardupilot and QGroundControl, which are the trademarks and property of their respective owners. I do not own any rights to these logos, and their use in this post is solely for informational and illustrative purposes. The inclusion of these logos does not imply any affiliation, sponsorship, endorsement, or approval by the respective companies. All trademarks and copyrights remain the property of their respective owners.